
Overview
You can create tree root protection zones and crown spreads as secondary features from a parent tree point, or hedge edge extents and centrelines from a parent hedge line. This is useful for automatically recording arboricultural survey data including the Root Protection Radius (RPR) (or alternatively known as Root Protection Area (RPA)) calculated from stem diameters, crown spreads (even or uneven), and hedge extents with configurable widths and surveyed sides.
For tree group inspections, an optional fencing secondary feature can also be generated alongside the group root protection area. This is useful when the same buffered polygon should also be recorded as a fencing or exclusion-zone feature whenever fencing is required for the surveyed tree group.
Tree Inspection — Parent Feature Type Setup
Point feature type with:
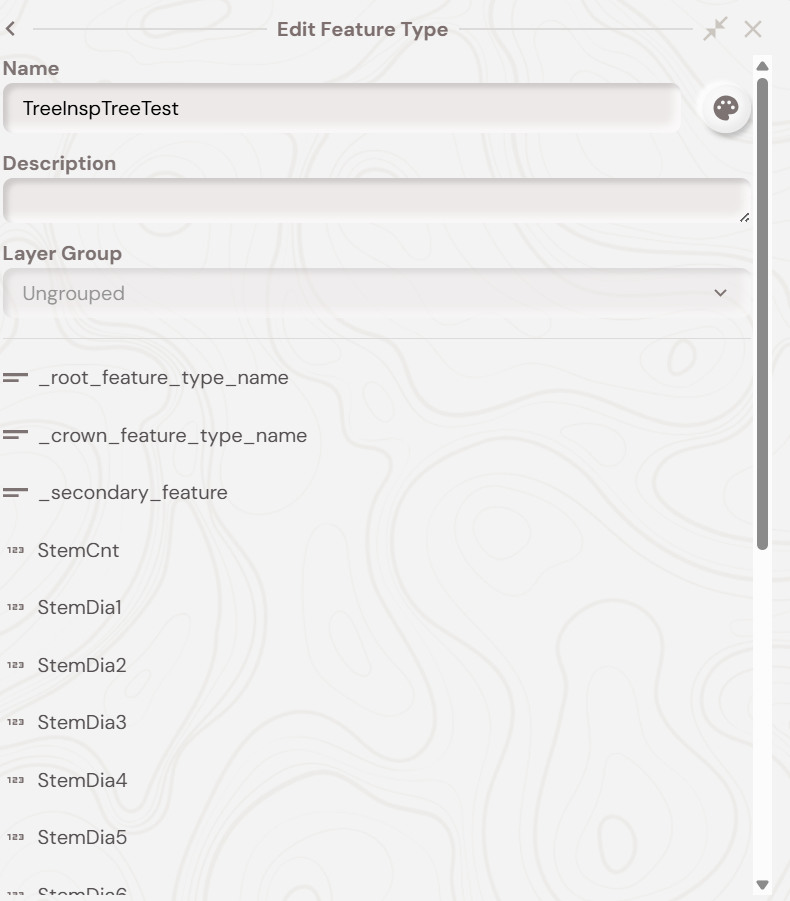
_secondary_feature— default!MODIFIER-HIDE;TreeInspection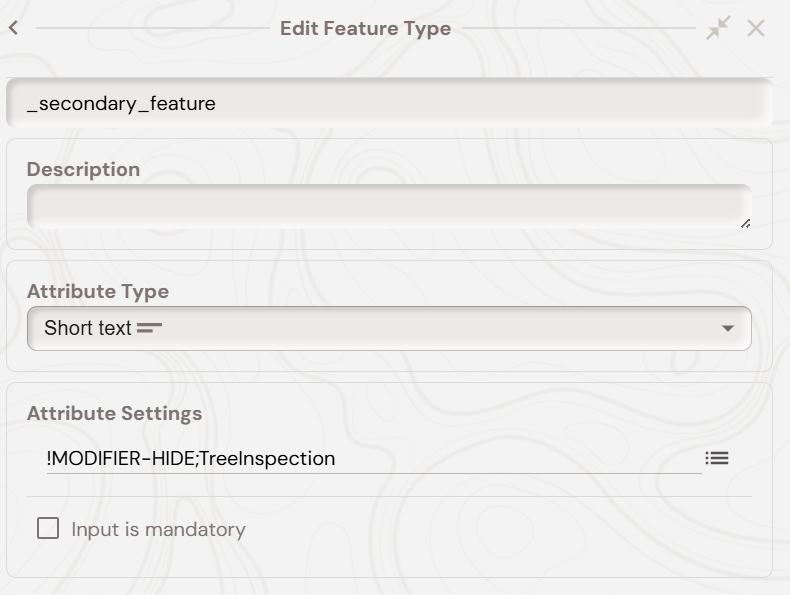
_root_feature_type_name— default!MODIFIER-HIDE;{YourRootTypeName}(e.g.TreeRoot)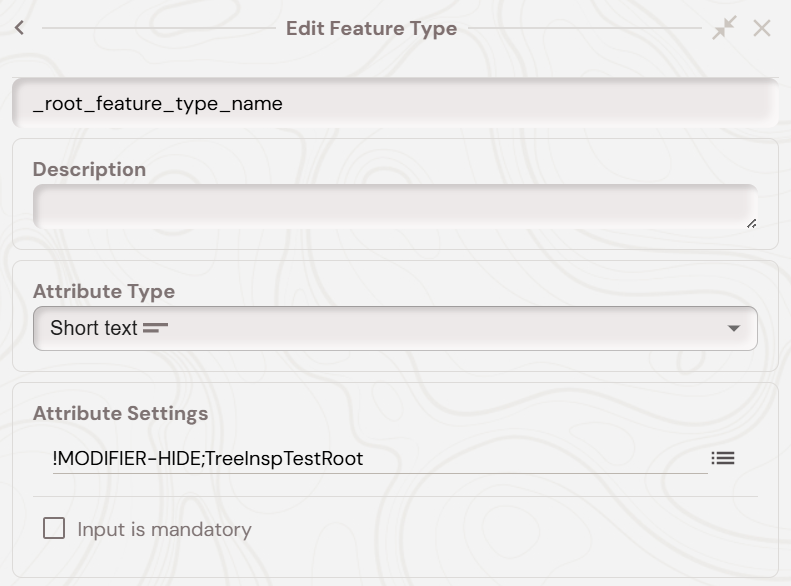
_crown_feature_type_name— default!MODIFIER-HIDE;{YourCrownTypeName}(e.g.TreeCrown)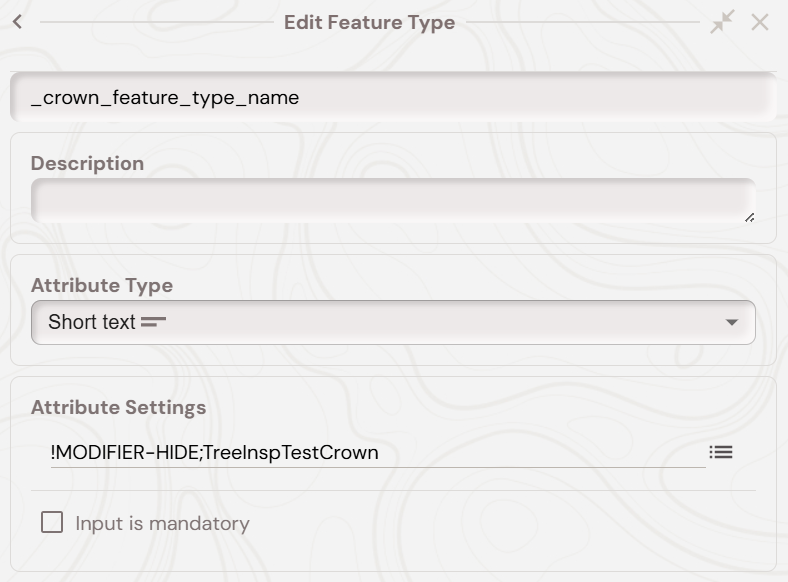
StemCnt(numeric, integers)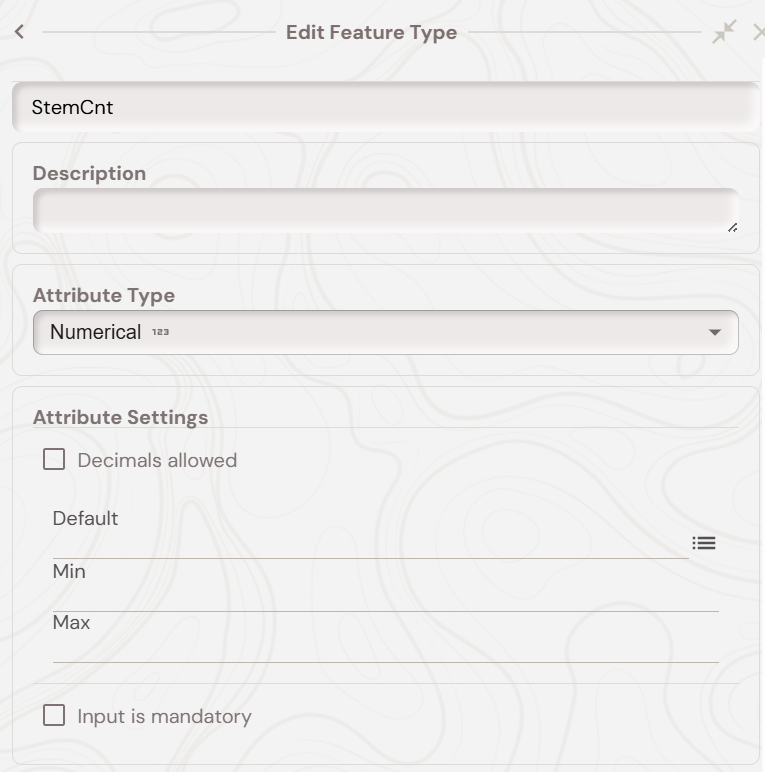
- Stem Diameters
Numerical attributes (with decimals allowed) for each stem diameter in millimeters:
StemDia1 with modifier code:!MODIFIER-SHOWWHEN $StemCnt != null && $StemCnt>0
StemDia2 with modifier code:!MODIFIER-SHOWWHEN $StemCnt != null && $StemCnt>1
StemDia3 with modifier code:!MODIFIER-SHOWWHEN $StemCnt != null && $StemCnt>2
StemDia4 with modifier code:!MODIFIER-SHOWWHEN $StemCnt != null && $StemCnt>3
StemDia5 with modifier code:!MODIFIER-SHOWWHEN $StemCnt != null && $StemCnt>4
StemDia6 with modifier code:!MODIFIER-SHOWWHEN $StemCnt != null && $StemCnt>5
These attributes will only show when the stem count is greater than the corresponding number. The screenshot below shows the ‘SteamDia1’ attribute.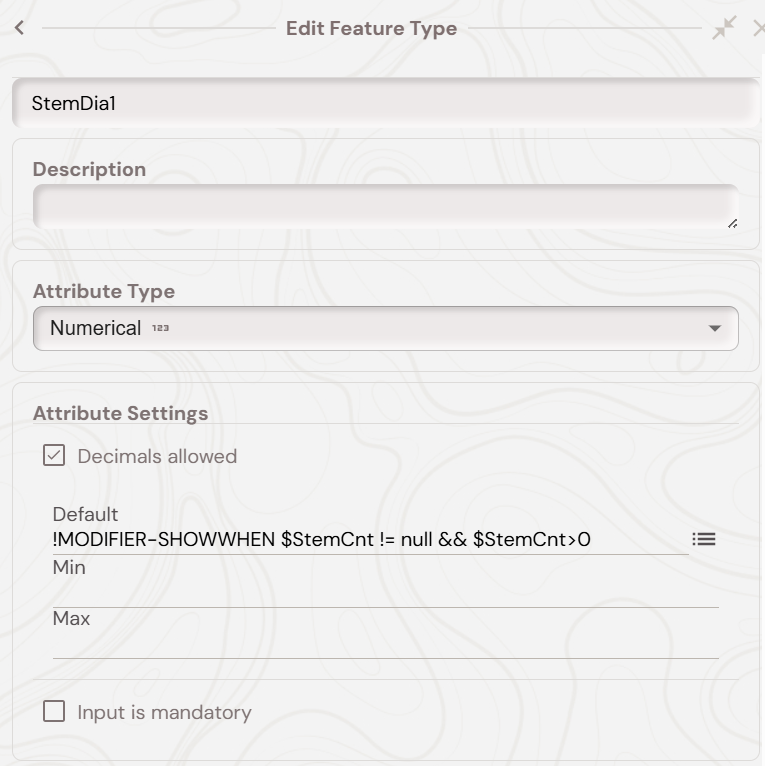
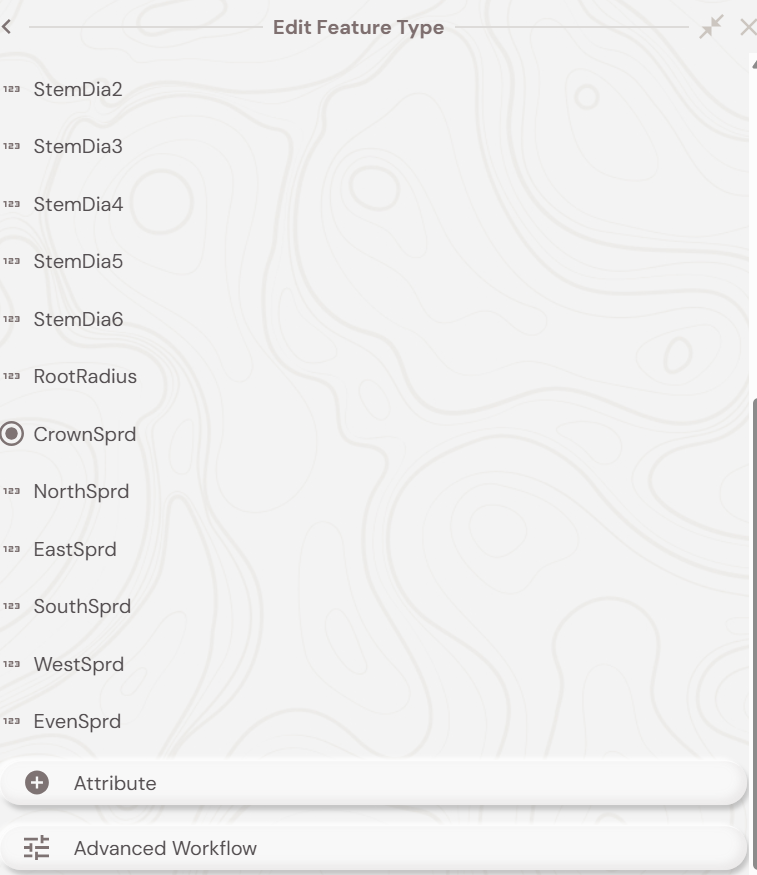
RootRadius(numeric) — default!CALCRPR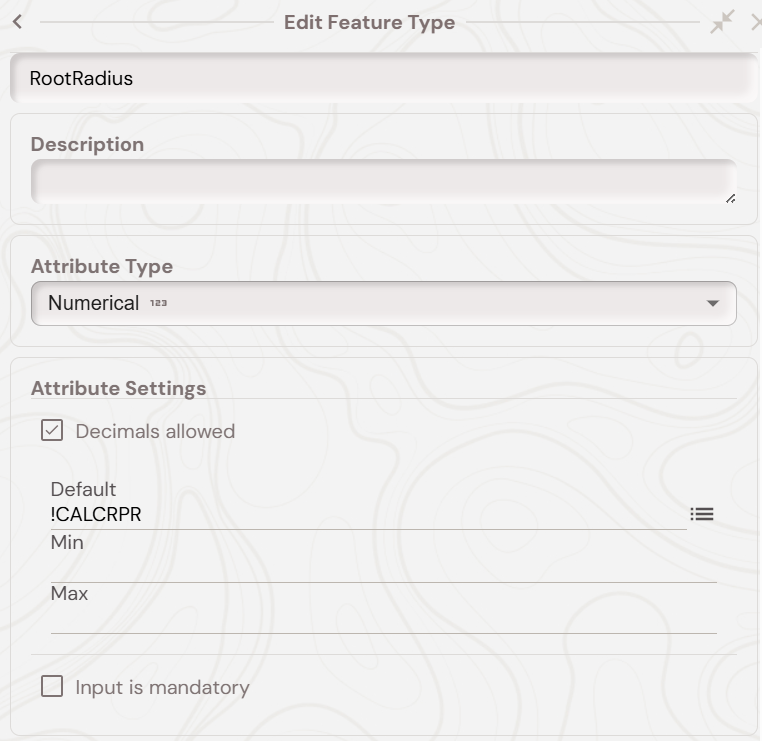
The
!CALCRPRcalculation automatically computes the Root Protection Radius, in metres, based on the number of stems and their diameters:For single stem trees: Uses StemDia1 * 12
For 2-5 stems: Calculates based on the square root of the sum of squared diameters * 12
For 6+ stems: Uses StemDia1 and StemCnt to calculate an average
The result is capped at a maximum of 15 metresCrownSprd(radio) — even / uneven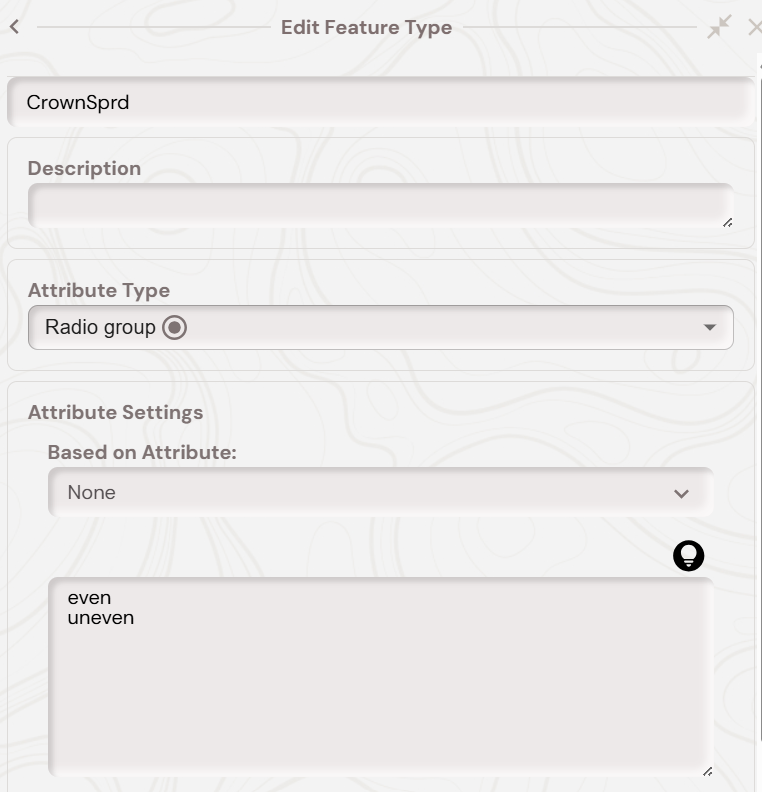
- Uneven Spread Measurements
Numerical attributes (with decimals allowed) for directional crown spread measurements in metres, each with the modifier code!MODIFIER-SHOWWHEN $CrownSprd=='uneven'. The attribute names for these are:
NorthSprd
EastSprd
SouthSprd
WestSprd
These attributes will only show when “uneven” is selected for CrownSprd. The screenshot below shows the ‘NorthSprd’ attribute: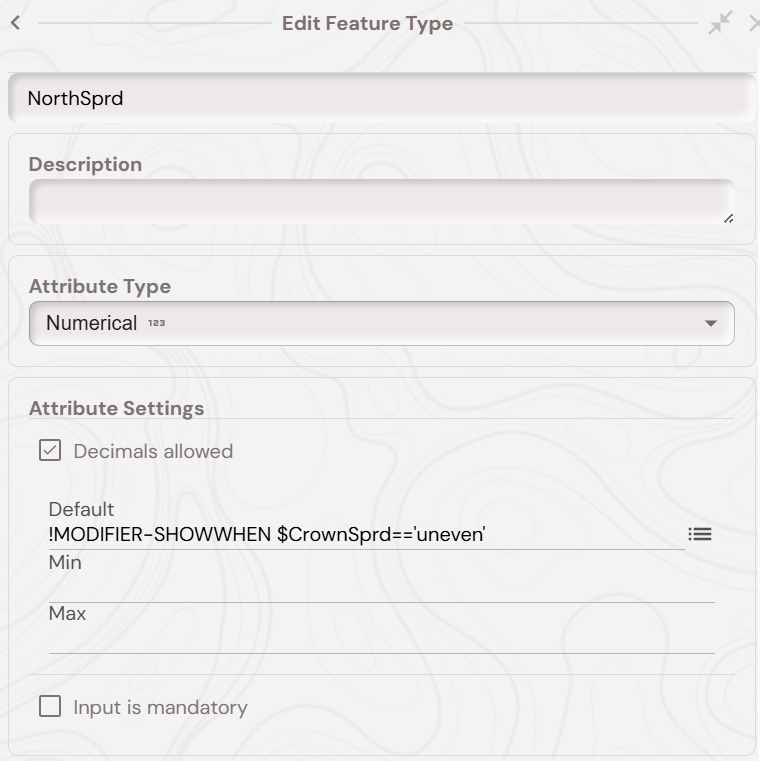
- Even Spread Measurement
A numerical attribute (with decimals allowed) named EvenSprd with the modifier code!MODIFIER-SHOWWHEN $CrownSprd=='even'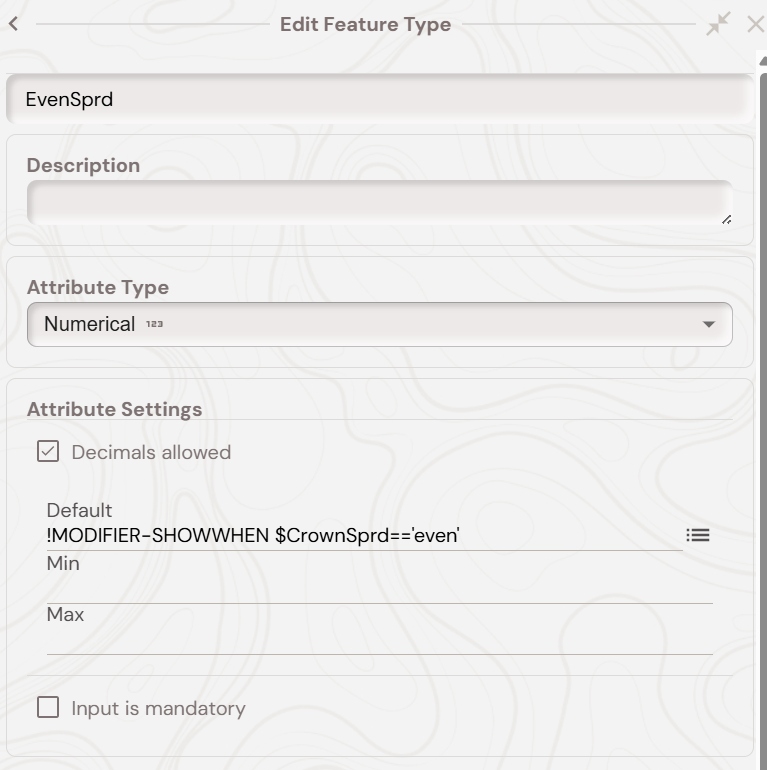
At the end, your parent tree inspection feature type should look like below:
Tree Inspection — Child Root Feature Type
You must setup a area feature type with the name specified in your parent feature type’s _root_feature_type_name attribute (e.g., TreeInspTestRoot).
The root feature represents the root protection radius of the tree and is automatically generated as a circular line around the tree point based on the calculated RootRadius value.
- Create a area feature type with your chosen name
- Optionally add any attributes that you want to copy from the parent feature (e.g. species information)
- Style the feature type as desired to represent the root protection zone
If the parent feature has matching attribute names, their values will be automatically copied to the root feature when it’s generated.
Tree Inspection — Child Crown Feature Type
You must setup an area (polygon) feature type with the name specified in your parent feature type’s _crown_feature_type_name attribute (e.g., TreeInspTestCrown).
The crown feature represents the tree’s canopy spread and is automatically generated as either:
- A circular polygon (for even spread)
- An elliptical polygon (for uneven spread with directional measurements)
- Create a polygon (Area) feature type with your chosen name
- Optionally add any attributes that you want to copy from the parent feature (e.g species information, etc)
- Style the feature type as desired to represent the tree canopy
If the parent feature has matching attribute names, their values will be automatically copied to the crown feature when it’s generated.
Hedge Inspection — Parent Feature Type Setup
You must setup a parent feature type for hedge inspection based secondary features. The parent should have a linear geometry type for hedge lines. This parent linear feature type must have the following setup:
_secondary_feature— default!MODIFIER-HIDE;TreeInspection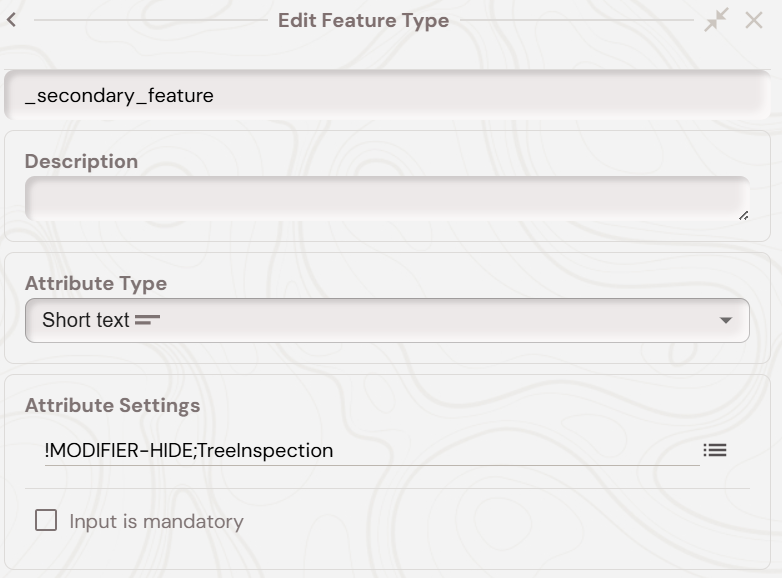
_hedge_edge_feature_type_name— default!MODIFIER-HIDE;{YourHedgeEdgeType}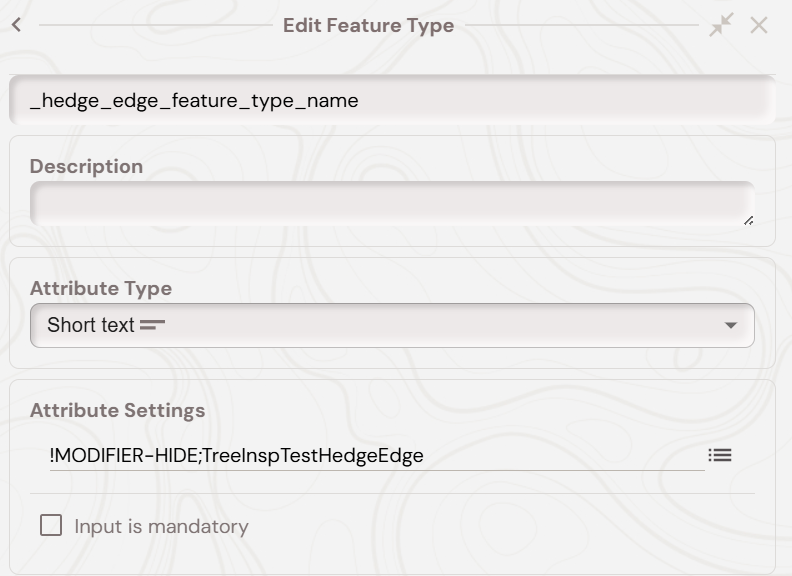
_hedge_centre_feature_type_name— default!MODIFIER-HIDE;{YourHedgeCentreType}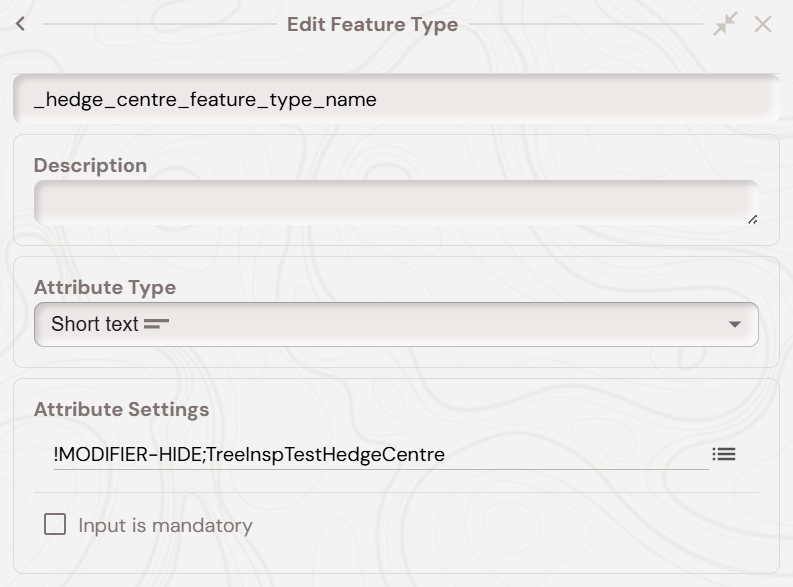
width(numeric, metres)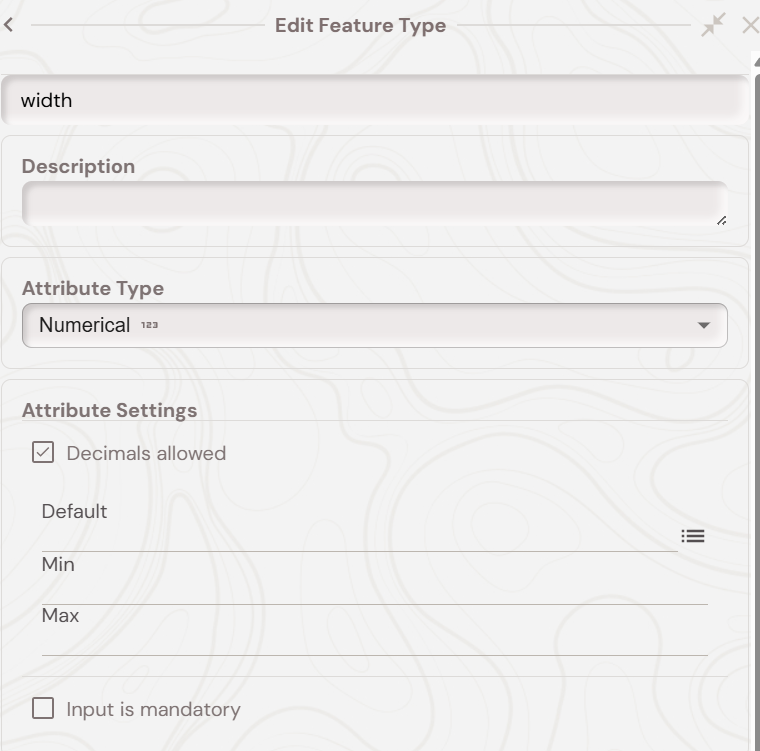
- Surveyed Side
A radio group attribute named Surveyed with three options:
left
right
centre
This determines which side of the drawn line represents the surveyed edge of the hedge.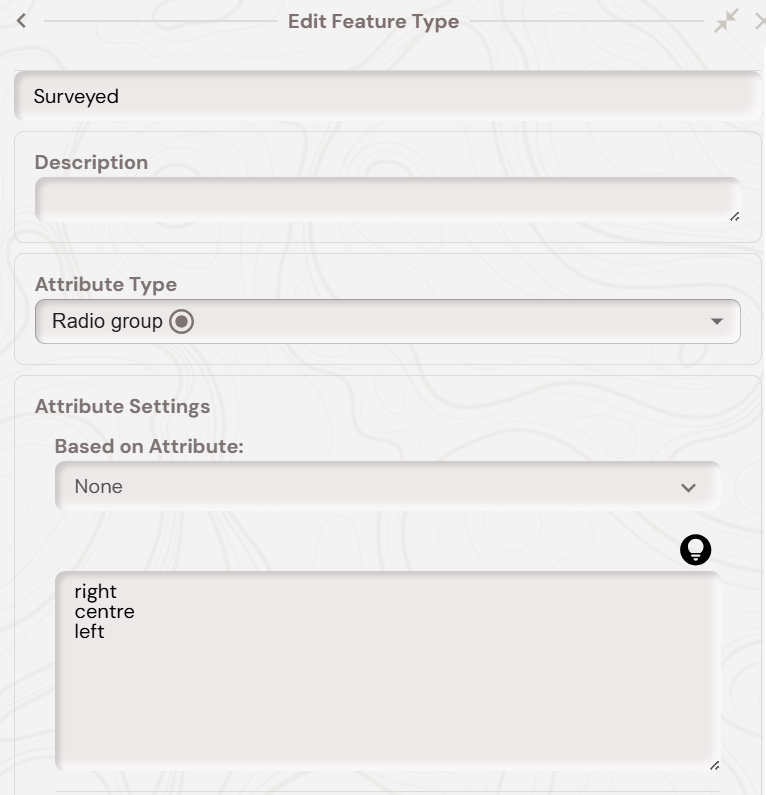
At the end, your parent hedge inspection feature type should look like below: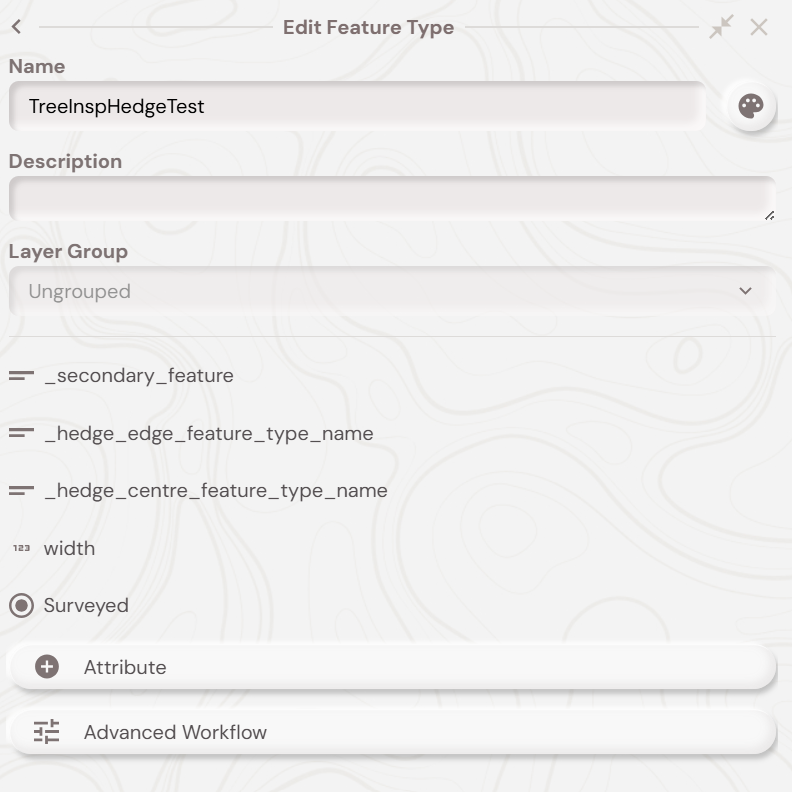
Hedge Inspection - Hedge Centre Child Feature Type
You must setup a linear feature type with the name specified in your parent hedge feature type’s _hedge_centre_feature_type_name attribute (e.g., TreeInspTestHedgeCentre).
The hedge centre feature represents the centrelines of the hedge and is automatically generated based on the surveyed side and width:
For “left” surveyed: offset to the right by half the width
For “right” surveyed: offset to the left by half the width
For “centre” surveyed: uses the drawn line as-is
- Create a linear (LineString) feature type with your chosen name
- Optionally add any attributes that you want to copy from the parent feature (e.g species information)
- Style the feature type as desired to represent the hedge centerline
If the parent feature has matching attribute names, their values will be automatically copied to the hedge centre feature when it’s generated.
Hedge Inspection - Hedge Edge Child Feature Type
You must setup an area (polygon) feature type with the name specified in your parent hedge feature type’s _hedge_edge_feature_type_name attribute (e.g., TreeInspTestHedgeEdge).
The hedge edge feature represents the full extent of the hedge and is automatically generated as a polygon buffer based on the surveyed side and width.
- Create a polygon (Area) feature type with your chosen name
- Optionally add any attributes that you want to copy from the parent feature (e.g. species information)
- Style the feature type as desired to represent the hedge extent
If the parent feature has matching attribute names, their values will be automatically copied to the hedge edge feature when it’s generated.
Tree Group Inspection — Parent Feature Type Setup
You can also generate a root protection area from a parent area (polygon) feature type. This is useful where a group of trees is surveyed as a single polygon, and you want Soarvo Mobile to automatically create a buffered root protection area around that polygon.
The parent tree group feature type must be an area feature type with the following setup:
-
_secondary_feature— default!MODIFIER-HIDE;TreeInspection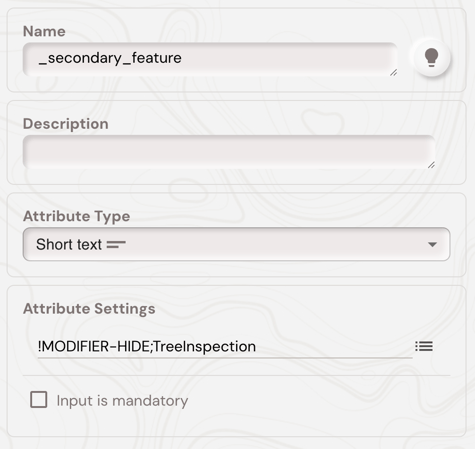
-
_group_root_feature_type_name— default!MODIFIER-HIDE;{YourGroupRootTypeName}For example: TreeGroupRoot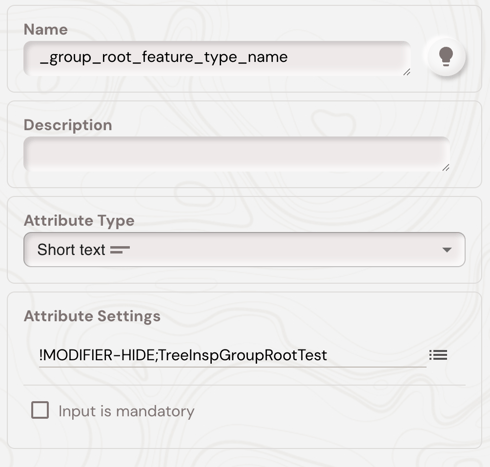
-
avRPR(numeric, metres). This value is used as the buffer distance around the parent tree group polygon. Typically a !CALC default code expression is used to calculate this value. _group_fencing_feature_type_name— default!MODIFIER-HIDE;{YourGroupFencingTypeName}. For example:MODIFIER-HIDE;TreeGroupFencing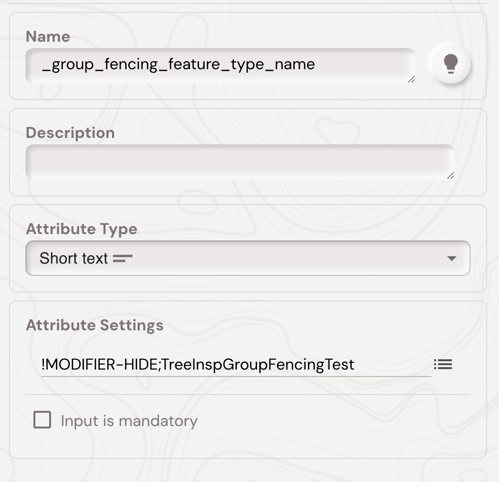
This optional attribute tells Soarvo Mobile which area feature type should be used when generating the fencing secondary feature.Fencing— radio group with options such as yes, no.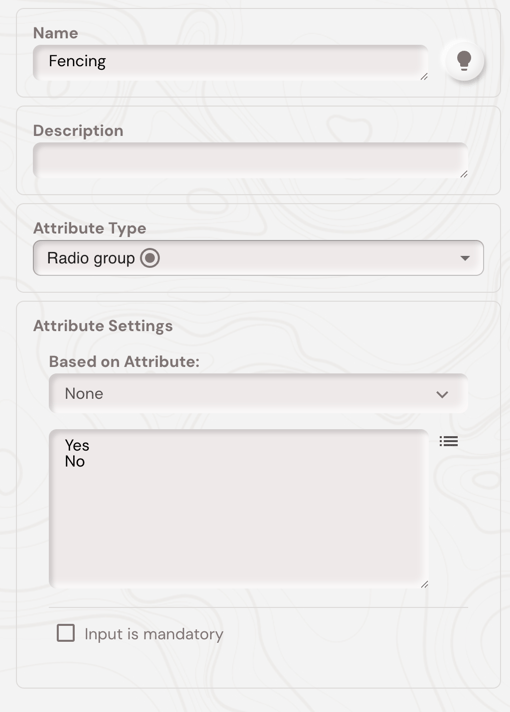
WhenFencingis set toYes, Soarvo Mobile will automatically generate the fencing feature when the parent tree group feature is saved. The value is case-insensitive, so values such as `Yes`, `YES`, or `yes` will all trigger fencing generation.
At the end, your parent tree group inspection feature type should look like below, you may have additional attributes depending on how you're calculating the avRPR:
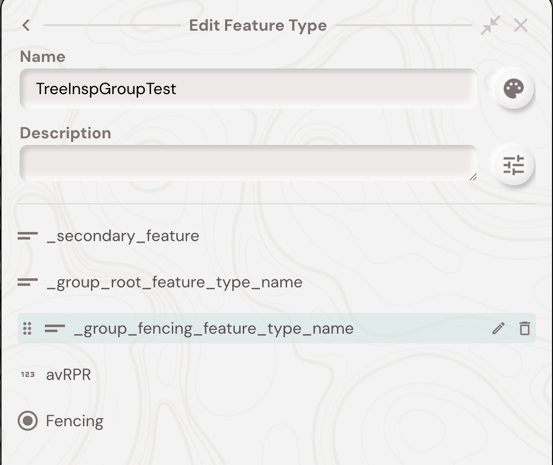
Tree Group Inspection — Child Root Feature Type
You must setup an area (polygon) feature type with the name specified in your parent feature type’s _group_root_feature_type_name attribute.
The tree group root feature represents the root protection area for the whole tree group. When the parent area is saved, Soarvo Mobile automatically creates a buffered polygon around it using the avRPR value.
For example, if the parent tree group polygon has avRPR = 4, the generated root feature will be a polygon buffered 4 metres out from the parent polygon boundary.
-
Create an area (polygon) feature type with your chosen name
-
Make sure the name exactly matches the value used in
_group_root_feature_type_name -
Optionally add any attributes that you want to copy from the parent feature, such as species, survey reference, or condition information
-
Style the feature type as desired to represent the tree group root protection area
If the parent feature has matching attribute names, their values will be automatically copied to the generated tree group root feature.
Tree Group Inspection — Child Fencing Feature Type
You can optionally create an area (polygon) feature type with the name specified in your parent feature type’s _group_fencing_feature_type_name attribute.
The tree group fencing feature represents the fencing or exclusion-zone extent for the whole tree group. When the parent tree group polygon is saved and the parent feature’s Fencing attribute is set to Yes, Soarvo Mobile automatically creates a fencing feature using the same buffered polygon geometry as the generated tree group root feature.
For example, if the parent tree group polygon has avRPR = 4 and Fencing = yes, the generated fencing feature will be a polygon buffered 4 metres out from the parent polygon boundary.
-
Create an area (polygon) feature type with your chosen name
-
Make sure the name exactly matches the value used in
_group_fencing_feature_type_name -
Add a
Fencingattribute if you want the selected fencing value copied from the parent feature -
Optionally add any other attributes that you want to copy from the parent feature, such as species, survey reference, condition information, or notes
-
Style the feature type as desired to represent fencing, exclusion zones, or protective barriers
If the parent feature has matching attribute names, their values will be automatically copied to the generated fencing feature.
The fencing feature is only created when all of the following are true:
-
The parent feature is an area feature using TreeInspection secondary features
-
_group_fencing_feature_type_nameis set -
avRPRcontains a valid numeric buffer distance in metres -
Fencingis set toYes. IfFencingis set toNoor left empty, Soarvo Mobile will still generate the tree group root feature, but it will not generate the fencing feature.
Tree Inspection - Mobile Demos
With all of the above setup done you should now be able to create tree and hedge inspection features on the Soarvo Mobile app:
Tree Inspection Workflow
- Create a new feature using your tree inspection parent feature type
- Record the position of the tree on the map
- Fill in the stem count and stem diameters
- The Root Protection Radius will be automatically calculated
- Select crown spread type (even or uneven) and enter the spread measurements
- Save the feature
- The root (circular line) and crown features will be automatically generated
Hedge Inspection Workflow
- Create a new feature using your hedge inspection parent feature type
- Record the linear geometry of the hedge on the map (from the surveyed side)
- Fill in the hedge width
- Select which side was surveyed (left, right, or centre)
- Save the feature
- The hedge edge and hedge centre features will be automatically generated
When you delete a parent tree or hedge inspection feature, all of its associated secondary features (root, crown, fencing, or hedge edge/centre) are automatically deleted as well.
What's Next?