Overview
Soarvo Mobile integrates with Radio Detection RD8K Bluetooth cable and pipe locators. Pair the RD8K to your Android device and locator measurements flow directly into feature attributes.
Step 1 — Pair the RD8K to your Android device
You will need to first follow the manual for whichever RD8K unit you have for pairing to your Android device first. The videos below show how this is done for a RD8200 unit, but should be similar for RD8100 units also.
On the RD8K (procedure varies by model — check your manual):
- Ensure Bluetooth communication is enabled via setting the ‘COM’ option to ‘on’
- Ensure the protocol (PROT in the RD8K UI) is ASCII. Where this is done can change depending on the unit version. The ASCII protocol version should also be set to ‘2’ if available
- If the ‘PHONE’ option is available, ensure it is set to ‘ANRD’
- Ensure the RD8K unit is paired to the android device via Bluetooth. The name of the bluetooth device is different depending on the unit and is separate from the RTK Locator built into some RD8K units. So consult the manual for your units Bluetooth name
The video below shows how to change the ‘COM’ option to ‘on’.
If Bluetooth communication has been successfully enabled, you should see a Bluetooth icon on the RD8K units display, which is highlighted in the below screenshot.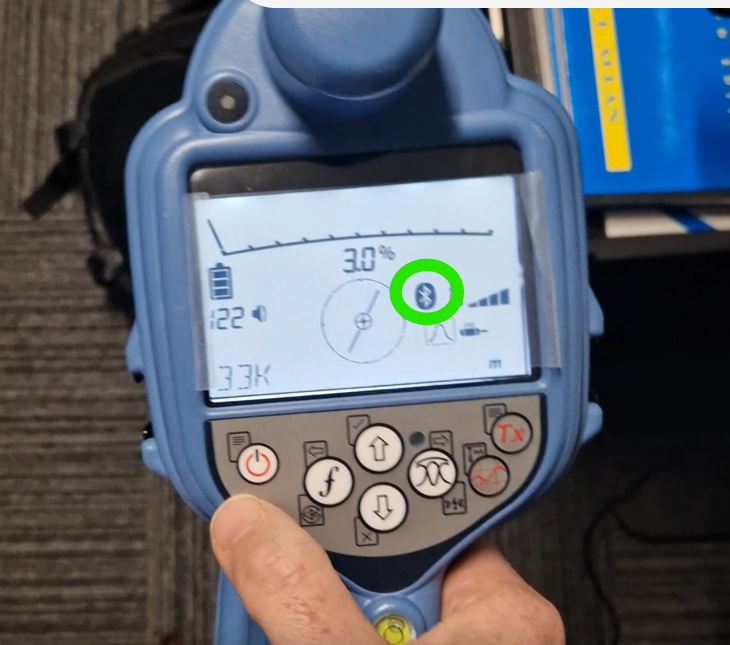
The video below shows how to change the ‘PROT’ option, which should be set to ASCII, ASCII version to ‘2’.
Step 2 — Connect the RD8K to Soarvo Mobile
Once the RD8K is paired and setup properly – you then need to configure Soarvo Mobile to receive readings from the unit. The below video shows how you can do this via the ‘External Devices’ section in the GPS management page.
In summary, the important aspects of the above video are:
- The feature type selected in the ‘RD8K Feature Type’ configuration field is the feature type that is used to auto start a feature when you’re in the location features overview page, and are not recording a feature. If no feature type is selected, then a feature type with a name of ‘RD8K’ is attempted to be used.
- Once the RD8K connection is enabled in the app, this connection is auto attempted on each boot up of the app. So you should not have to keep re-enabling it.
Step 3 — Record RD8K Data in a Feature
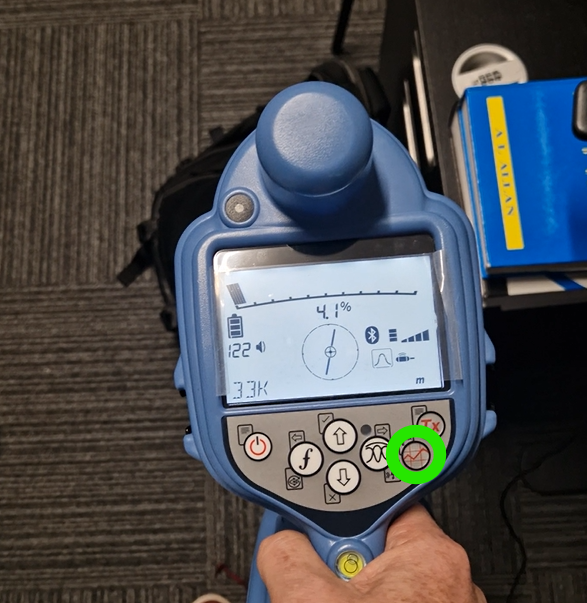
You can take and send a measurement from the RD8K unit by clicking the button highlighted by the green circle in the image below. The Bluetooth icon on the RD8K units display panel will begin flashing, if an error does occur this will be displayed on the bottom left of the units display panel with an error code – which can be checked against the manual.
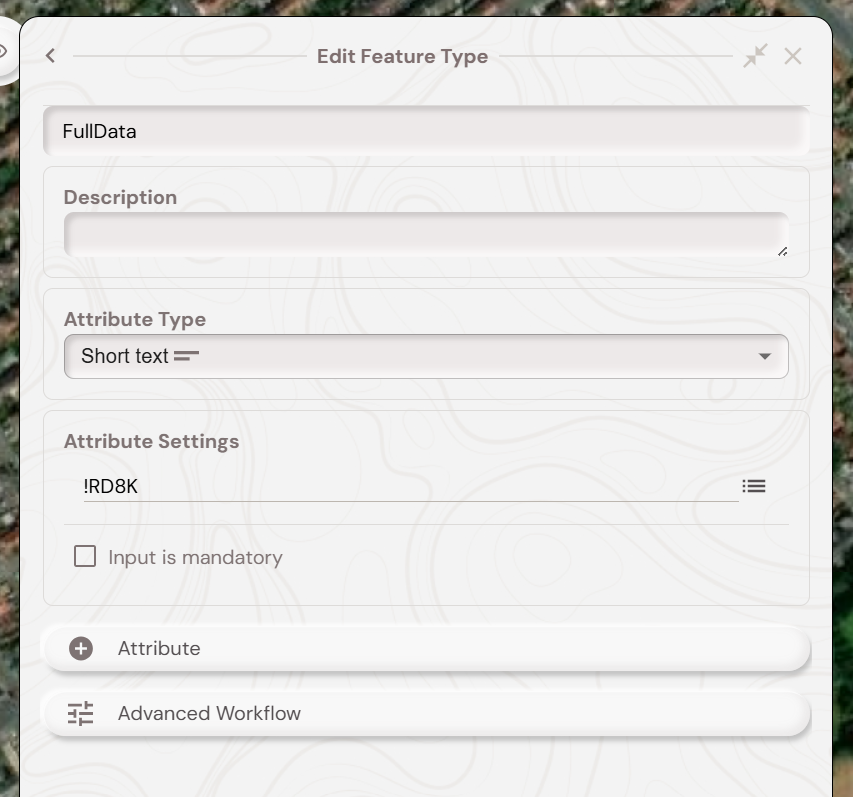
As you can see in the video in the above section, the full data string from the RD8K unit is auto added to the ‘FullData’ attribute. This is useful to see the raw data from the unit. You can get this by adding an attribute with a default code of ‘!RD8K’ to the feature type selected in the ‘RD8K Feature Type’, like in the below screenshot.
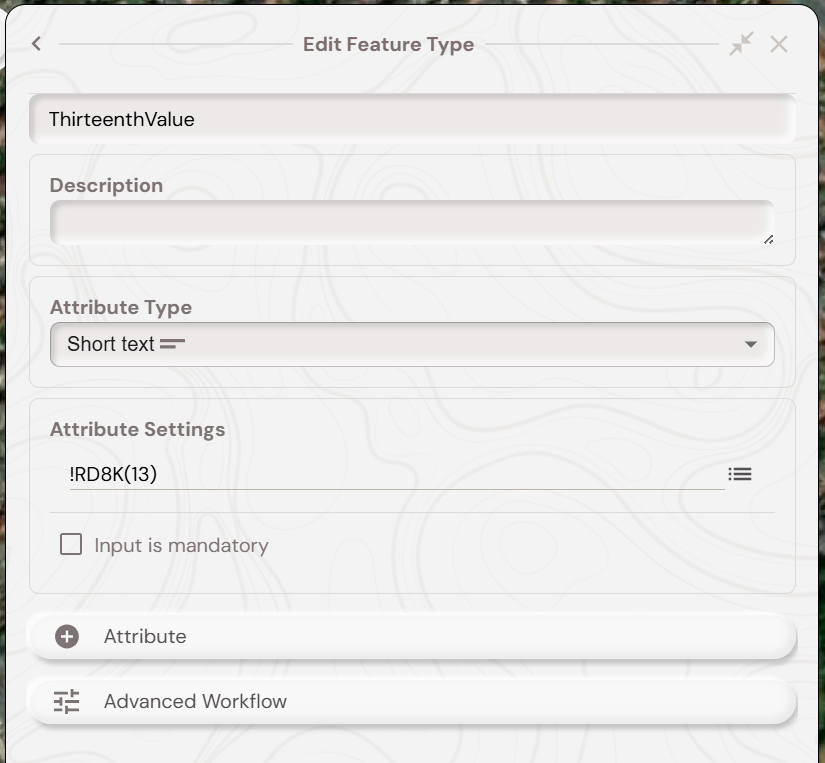
To instead just use a single value from the RD8K measurement (such as the depth) data you will need to know its index in the data which is comma separated. Then you can setup an attribute with a default code of ‘!RD8K(n)’ where n is the position of the value within the RD8K data (which is a 1 based index). For instance, if I want to pull out the 13th value from the data then I would setup an attribute like in the below screenshot.
RD8K Readings as Line/Polygon Nodes
If you’re recording a linear or area feature and record a measurement on the RD8K unit then your current position is added as a node to the linear or area feature. If the project contains a ‘RD8KNode’ point feature type then a point feature for each node measurement is also created. You can also use !RD8K default codes within the RD8KNode feature types attributes.
RD8K Bluetooth GPS Receiver as Position Source
Some RD8K units come with a Bluetooth GPS receiver which can receive RTK corrections. The Bluetooth GPS receiver is usually a separate Bluetooth device (as listed in the Android Bluetooth connections, not a physically separate one) from the RD8K locator. You will need to pair this Bluetooth GPS receiver with your android device, the manual for your RD8K unit will contain instructions for this.
After pairing – you should be able to follow the ‘Generic Bluetooth GNSS Receiver Pairing’ section of the external receivers setup page.
Please ensure you only use RTCM 3.x enabled mountpoints if your RD8K unit is the RD8200SG unit and want to use RTK corrections.
for the RD8200SG unit, there will be a flashing green light on the unit when the position is of RTK float quality. This changes to a solid green when the position is of RTK fixed quality.
What's Next?